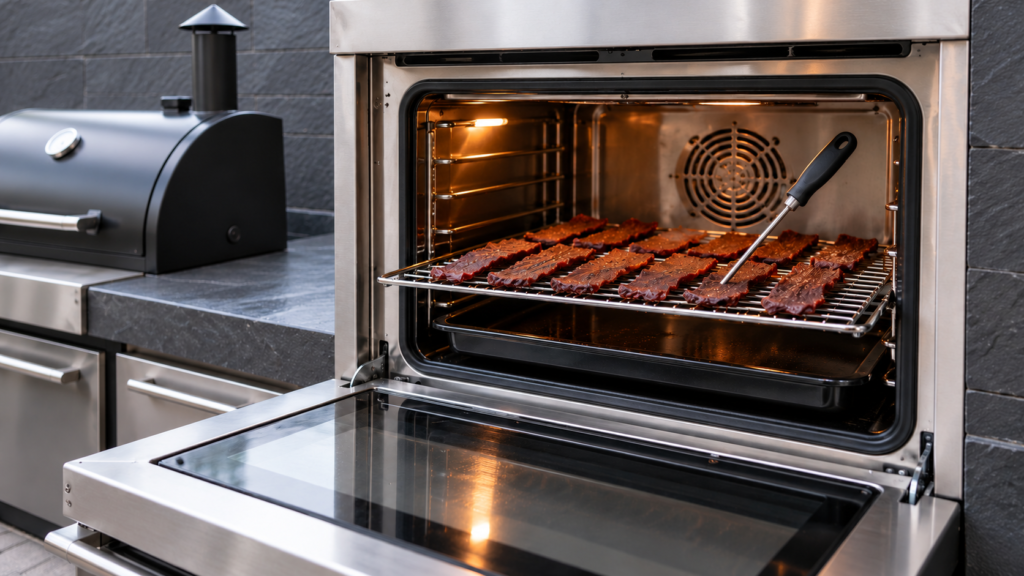
Jerky is a genuinely different preservation method from everything else in this category. Bacon and the cured brisket preparations elsewhere on this site rely on curing salt to make a safe product; jerky relies mostly on removing moisture until bacteria can’t grow in what’s left. That difference matters more than it sounds, because the specific safety step most home jerky guides skip, heating the meat to a safe temperature before drying, is the one step that actually closes the real gap between a shelf-stable snack and a genuine food-safety risk.
Why drying alone isn’t automatically safe
A home dehydrator or a low oven typically runs in the 130 to 160°F range, warm enough to dry meat over several hours but, on its own, not reliably hot enough to kill harmful bacteria that might already be present on raw meat before drying starts. The USDA’s specific guidance for home jerky addresses this directly: meat should be heated to 160°F (165°F for poultry) before the drying process begins, not relied upon to reach that temperature gradually during drying alone. This is the single most important food-safety detail in this entire article, and it’s the step a lot of informal recipes skip or treat as optional.
Two practical ways to hit that pre-drying temperature: marinate the meat, then bring the marinade itself to a boil and simmer the strips in it briefly before transferring to the dehydrator or oven, or steam the sliced, marinated meat over boiling water until it reaches 160°F internally, confirmed with a thermometer rather than estimated by time. Either method satisfies the actual safety requirement; skipping both and going straight from raw, marinated meat into a dehydrator does not.
Picking the right cut, and why fat is the real enemy here
Lean cuts are the only realistic choice for jerky, and this is a harder rule than it is for almost anything else on this site. Fat doesn’t dry the way muscle fiber does; it stays soft, doesn’t dehydrate properly, and goes rancid well before the lean meat around it would spoil, which shortens the shelf life of the entire batch regardless of how well everything else was handled. Eye of round, top round, flank, and sirloin tip are all common choices specifically because they carry very little visible fat and trim easily. Any visible fat, gristle, or silverskin should be trimmed away completely before slicing, not left on with the hope that drying will somehow handle it.
| Cut | Why it works for jerky |
|---|---|
| Eye of round | Very lean, widely available, slices cleanly |
| Top round | Lean with good grain structure for slicing |
| Flank steak | Pronounced grain, useful for a chewier texture |
| Sirloin tip | Lean and reliably available at most counters |
Slicing with the grain in mind, on purpose
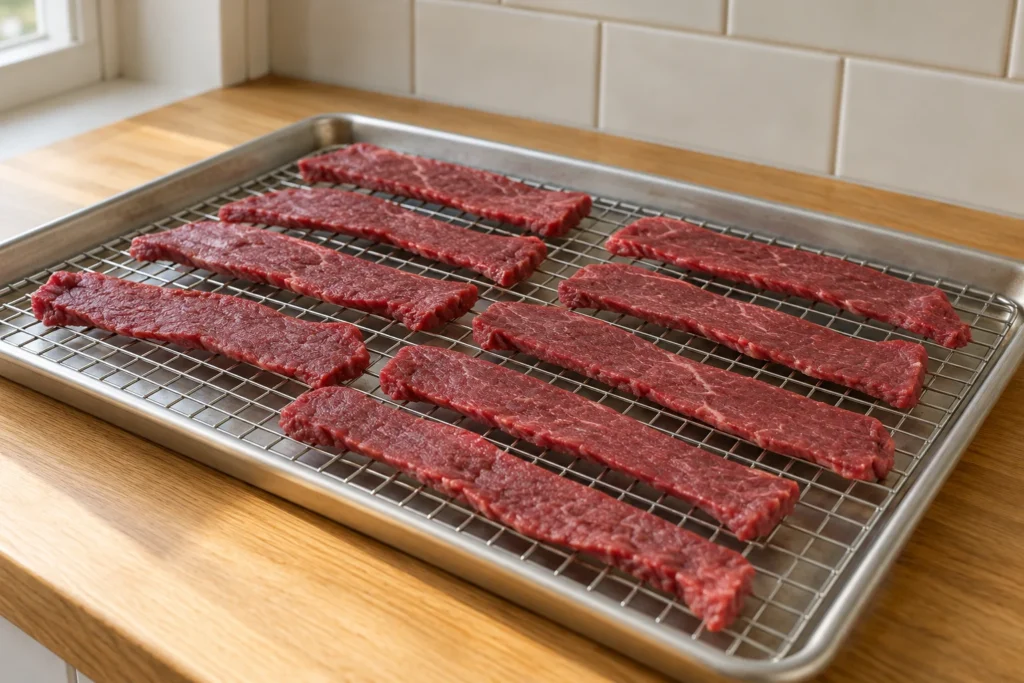
Slicing direction is a real, deliberate choice here, not an afterthought. Cutting with the grain produces jerky that’s genuinely chewy, almost stringy in a specific way some people actually prefer, since the long muscle fibers stay intact end to end. Cutting against the grain produces a more tender, easier-to-bite piece that breaks apart more readily. Neither is objectively correct; it’s a texture preference worth deciding on before slicing a whole batch one way by default. Partially freezing the meat for 30 to 60 minutes before slicing, firm but not solid, makes thin, even slices considerably easier to cut cleanly than slicing it fully thawed and soft.
Slices around a quarter-inch thick are a reasonable standard: thin enough to dry in a realistic amount of time, thick enough to still have real chew once finished.
Marinating for flavor, and the salt’s secondary role
A basic marinade built around salt, and often a curing agent depending on the specific recipe and how long the jerky needs to keep, soy-adjacent or otherwise savory liquid, and whatever spice blend defines the final flavor, needs at least several hours and ideally overnight in the refrigerator to actually penetrate the meat rather than just sitting on its surface. Salt here does real work beyond flavor: it pulls moisture out through osmosis before drying even begins, which gets a head start on the same dehydration the actual drying step is about to finish.
Whether a particular recipe calls for curing salt in addition to table salt depends on how long the finished jerky is meant to keep at room temperature versus refrigerated or frozen, and that specific ratio decision belongs with a trusted, current jerky-specific recipe rather than guesswork; the full chemistry behind curing salt and why more isn’t safer is covered in detail elsewhere on this site and applies the same way here if a recipe calls for it.
Equipment worth actually having for this
A dedicated food dehydrator is the single piece of equipment that makes jerky considerably easier and more consistent than any workaround, since it holds a steady, controllable low temperature with real airflow built in, something a standard oven simply isn’t designed to do well. An oven with the door propped open a few inches works as a genuine substitute, but it heats less evenly, wastes more energy holding a low temperature for hours, and needs closer attention throughout the process. A reliable instant-read thermometer matters just as much here as the drying equipment itself, since the pre-drying heat step depends entirely on an accurate reading rather than a guess at how hot the meat has gotten.
Beyond that, the equipment list is short: a sharp knife (or a slicer, for genuinely uniform thickness across a large batch), a non-reactive container for marinating, and airtight storage containers or vacuum-seal bags for the finished product. None of this is specialized or expensive relative to what it produces.
Jerky beyond beef
The same lean-cut, pre-heat, dry-slowly process applies to venison and other lean game covered elsewhere on this site, often with even better results than beef specifically, since lean game already carries less fat to trim and worry about going rancid than most cuts of beef do. Poultry jerky is a real option too, though it needs a higher pre-drying temperature (165°F rather than 160°F, the same safe-minimum distinction that applies to poultry everywhere else on this site) and tends to dry less evenly than a dense, uniform muscle like eye of round. Fattier meats, pork included, are a poor fit for jerky regardless of how lean a specific cut looks on the package, since even modest fat content shortens shelf life meaningfully compared to the leanest beef or venison cuts.
The actual drying process, dehydrator or oven
- After the pre-drying heat step above, pat the strips dry and arrange them in a single layer with space between pieces, never overlapping, so air reaches every surface.
- A dedicated dehydrator set to 155 to 160°F, or an oven propped slightly open with a wooden spoon to let moisture escape, both work; the oven method runs less evenly and needs more attention.
- Drying typically takes 4 to 8 hours depending on thickness, humidity, and the specific equipment, and the only reliable way to know it’s done is the texture itself: it should bend and crack slightly without snapping clean in two, and show no visible moisture when torn.
- Let it cool completely at room temperature before packaging, since sealing warm jerky traps condensation that can promote spoilage.
Testing for doneness without guessing
Properly dried jerky bends without breaking and cracks slightly at the bend rather than snapping clean through like a dry cracker, and it shows no beads of moisture when torn apart. Jerky that’s still soft and pliable with no cracking at all hasn’t finished drying; jerky that shatters instead of bending has gone too far. This simple bend-and-tear check is more reliable than time alone, since drying time varies meaningfully with humidity, slice thickness, and equipment.
Storage, and how long it actually keeps
Properly dried jerky, cooled completely before sealing, keeps at room temperature in an airtight container for 1 to 2 months, considerably longer refrigerated, and up to 6 months or more in the freezer. Humidity is the real enemy of shelf-stable jerky, more than time alone, so a genuinely airtight container, with a food-safe desiccant packet if available, matters more to actual shelf life than the exact storage temperature does. Jerky that develops any visible mold, an off smell, or unexpected softness after storage should be discarded rather than trusted.
Mistakes that turn a safety step into a shortcut
- Skipping the pre-drying heat step entirely. This is the single most important safety step in the whole process, and skipping it is the most common corner cut in informal jerky recipes.
- Leaving visible fat on the meat. Fat goes rancid before the lean meat spoils, cutting the shelf life of an entire batch regardless of how carefully everything else was handled.
- Overcrowding the dehydrator or oven tray. Pieces touching or overlapping dry unevenly, leaving some sections genuinely underdone while others are fully finished.
- Packaging it while still warm. Trapped condensation from warm jerky sealed too soon creates exactly the moist environment drying was meant to eliminate.
- Judging doneness by time alone instead of the bend-and-tear test. Humidity, thickness, and equipment all shift real drying time meaningfully from one batch to the next.
Batch size and why it matters more than it seems
A first attempt is usually better kept small, a pound or two of meat rather than a full dehydrator load. Smaller batches dry more evenly, since every piece ends up closer to the heat source and airflow, and they make it far easier to catch a texture or seasoning issue before committing a large amount of meat to the same mistake. Once a particular cut, slice thickness, and marinade combination is dialed in, scaling up to a full load is simple, since the process itself doesn’t change, only the quantity does. Crowding a dehydrator or oven rack, pieces touching or overlapping, is one of the more common reasons a batch dries unevenly, with some pieces finished and others still underdone at the same stated time.
Why store-bought jerky tastes and feels different
Commercial jerky often uses faster, more industrial drying methods and sometimes different curing agents or preservatives than a home batch would, which is part of why it can taste noticeably different, usually sweeter, saltier, or more uniformly textured, from one brand to the next. It’s also frequently rehydrated slightly after drying to improve texture and shelf appeal, a step most home recipes skip entirely. None of that makes commercial jerky better or worse than a home version; it’s simply optimized for a different set of goals, shelf stability at scale and consistent texture across a huge batch, than a home cook is actually trying to achieve.
Quick answers
Can I skip the marinade and just dry plain, salted meat? Yes, salt-and-pepper jerky with no other marinade is a legitimate, simpler version, as long as the pre-drying heat step and the lean-cut rule are both still followed. The marinade affects flavor, not the core safety process.
Why did my jerky turn out brittle instead of chewy? This is almost always over-drying, either too much time, too high a temperature, or both. Checking with the bend-and-tear test starting earlier than expected, rather than trusting a recipe’s stated time exactly, catches this before a whole batch goes too far.
Does jerky need to be refrigerated? Properly dried and sealed jerky is shelf-stable at room temperature for a real but limited window, typically 1 to 2 months. Refrigeration or freezing extends that window considerably and is the safer default for anything not going to be eaten within that shorter stretch.
Is it safe to marinate and dry meat without ever heating it to 160°F first, if the dehydrator runs hot enough for long enough? This is the specific shortcut USDA guidance warns against. A dehydrator’s low, steady temperature is excellent for removing moisture over many hours, but it isn’t reliably hot enough, consistently enough across every part of every piece, to guarantee the same bacterial kill a direct 160°F heat step provides. The extra step is a real safety measure, not a cautious suggestion to skip if short on time.
This is a technique guide, not a substitute for professional food-safety guidance. Home jerky carries real risk if the pre-drying heat step is skipped. Always heat meat to 160°F (165°F for poultry) before drying, verified with a thermometer, and follow a trusted, current recipe for marinade and timing specifics. References: USDA guidance on jerky and food safety and the National Center for Home Food Preservation.
Visual steps