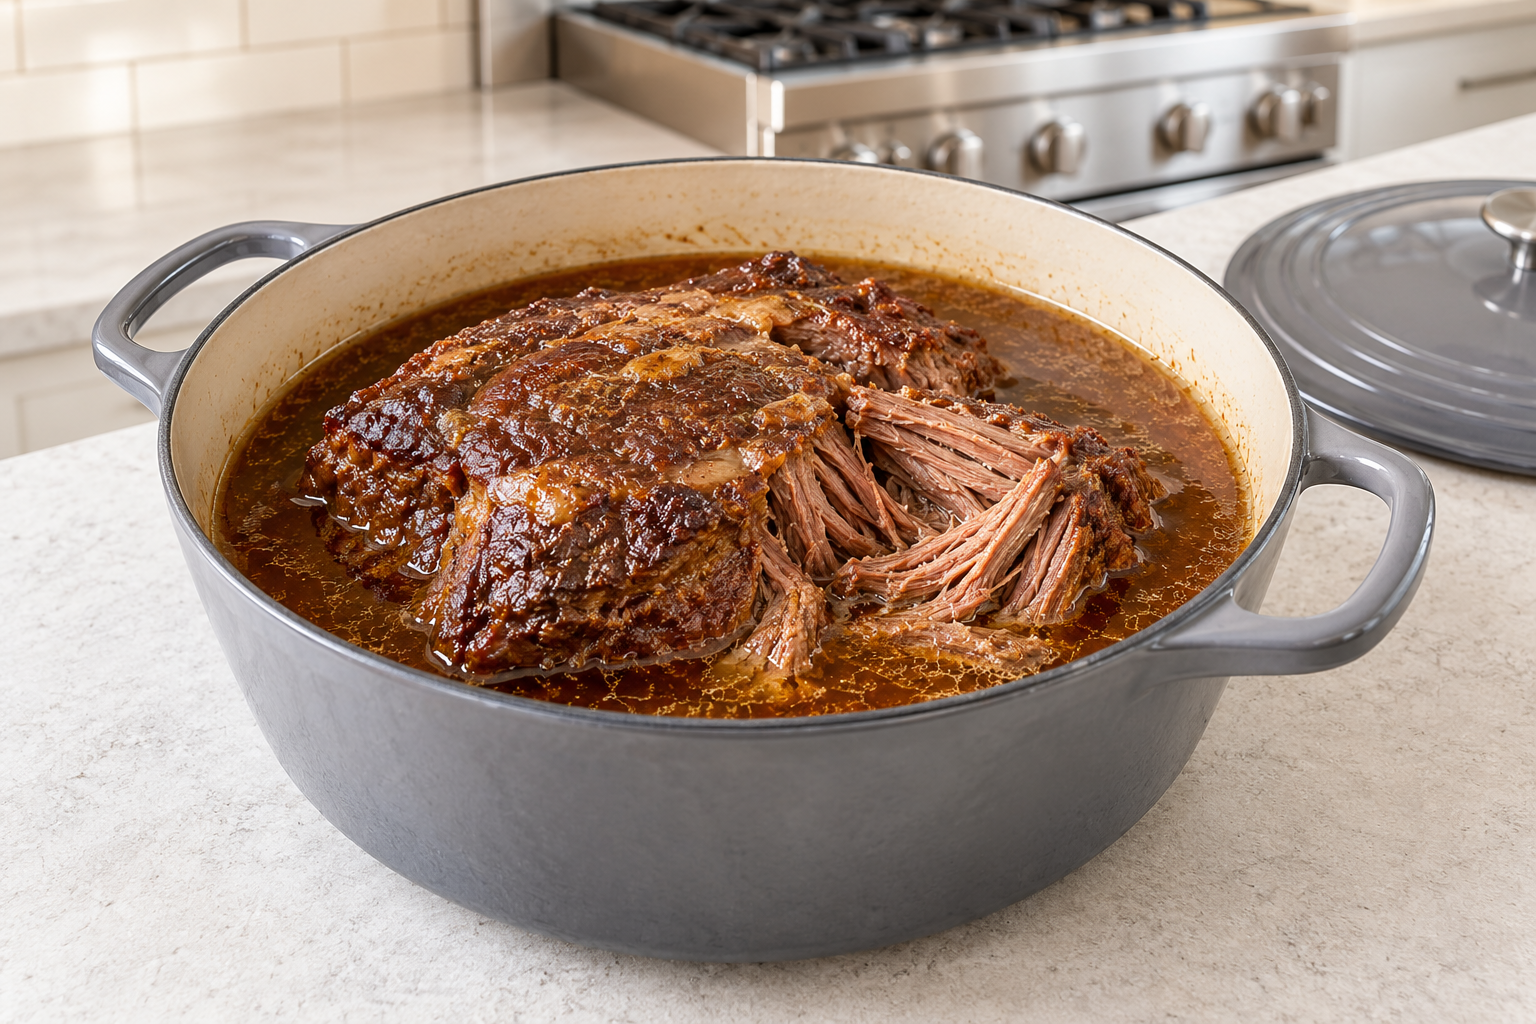
Chuck roast comes from the cow’s shoulder, a muscle group that does constant, low-level work every time the animal takes a step. That kind of work builds exactly the structure you’d expect: dense muscle fibers wrapped in a lot of connective tissue, built for endurance rather than speed. Cooked like a steak, chuck is tough enough to be nearly unchewable. Braised low and slow in bone broth for a few hours, that same connective tissue becomes the thing that makes chuck one of the richest, most satisfying pot roasts you can make; and one of the cheaper cuts in the whole meat case while it’s at it.
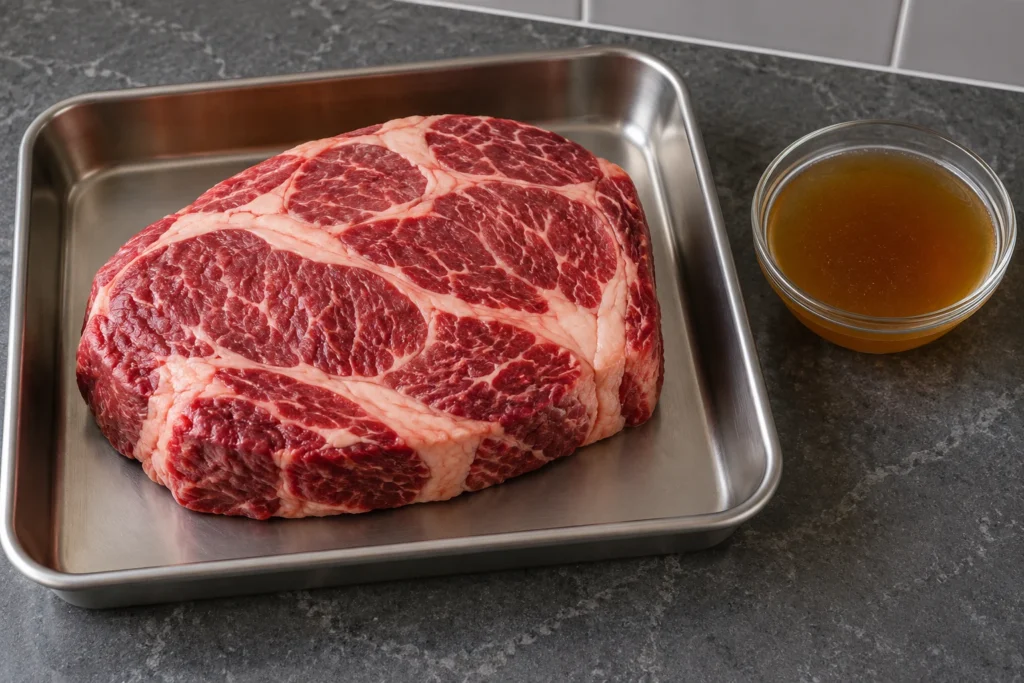
What you need
- 1 chuck roast, 3–4 lbs, boneless
- 2 tablespoons beef tallow
- 4–5 cups beef bone broth (meat, bones, water, salt only)
- 2–3 teaspoons coarse salt
- A light crack of black pepper, optional
Step by step
- Salt the roast generously on all sides and let it sit at room temperature for 30–45 minutes.
- Heat a Dutch oven over high heat with the tallow. Sear the roast on all sides until deeply browned, 4–5 minutes per side; a thick roast like this takes real time to brown properly, don’t rush it.
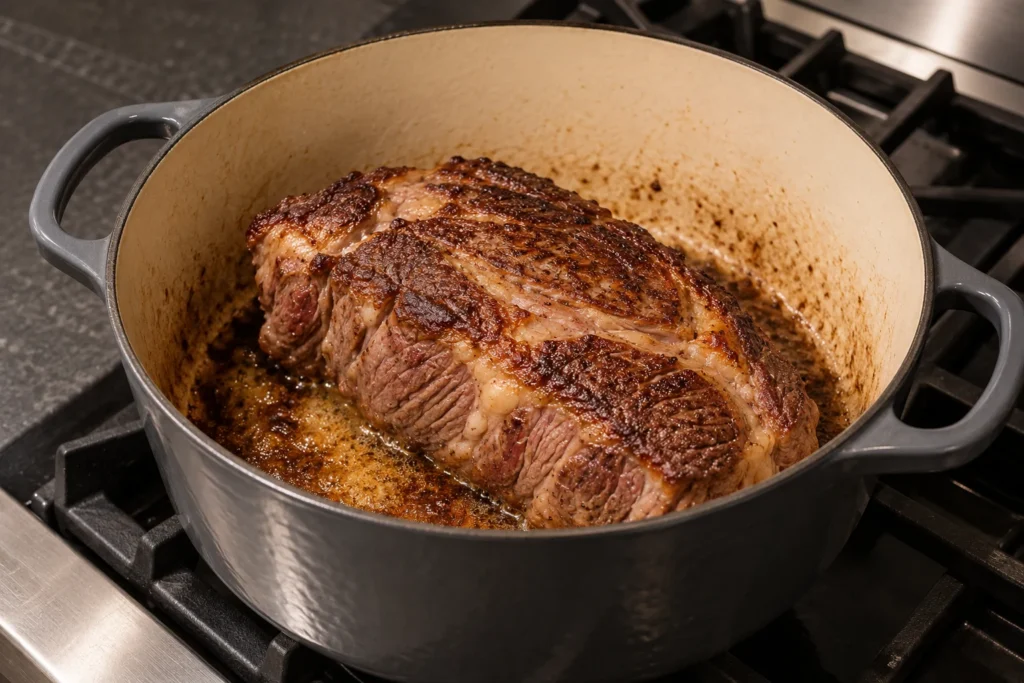
- Remove the roast and set aside. Pour the bone broth into the pot, scraping up the browned fond from the bottom.
- Return the roast to the pot. The broth should come about two-thirds up the sides of the meat.
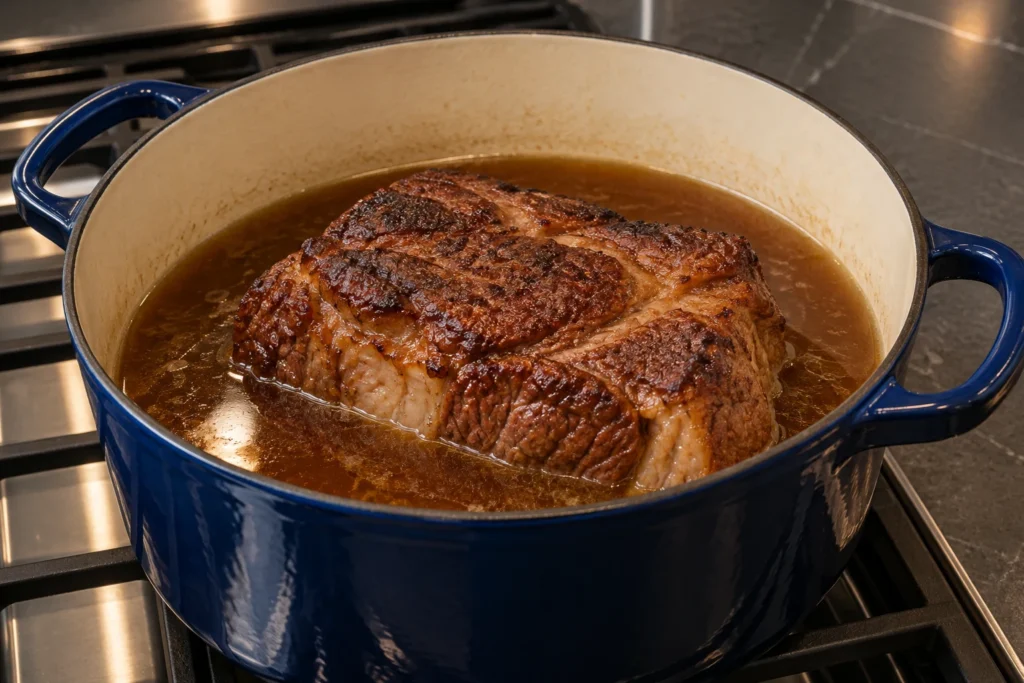
- Cover and either simmer on the lowest stovetop setting or move to a 300°F oven for 3.5 to 4 hours.
- Check at the 3.5-hour mark with two forks: the meat should pull apart with almost no resistance. If it still resists, give it another 30 minutes.
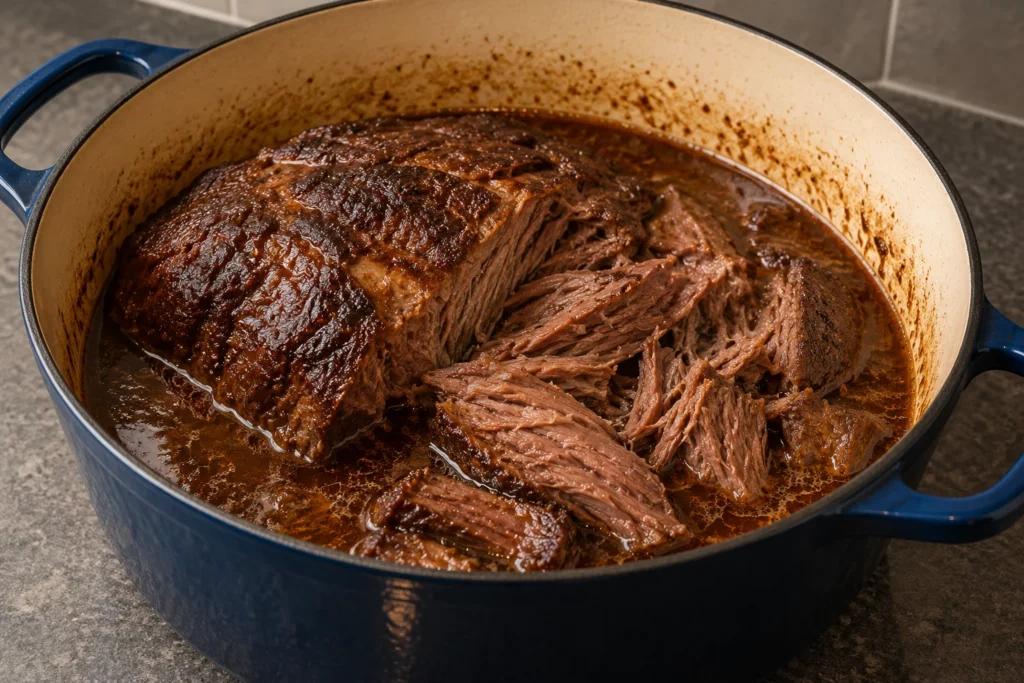
- Rest for 15 minutes before shredding or slicing. Skim excess fat from the braising liquid and spoon some back over the meat to serve.
The temperature question
Chuck passes the USDA’s 145°F safe minimum for whole-muscle beef well within the first hour of a long braise. The number that actually matters here is texture-driven, not safety-driven; chuck typically needs to reach somewhere around 203–206°F internally, with its collagen fully converted to gelatin, before it’s genuinely tender. Pulling it at 165°F because that sounds like a safe, reasonable number is one of the most common ways to end up with a tough pot roast; this cut simply needs far more time than that single number suggests, the same safety-floor-versus-doneness-goal gap covered on choosing a braising cut.
Shredding versus slicing
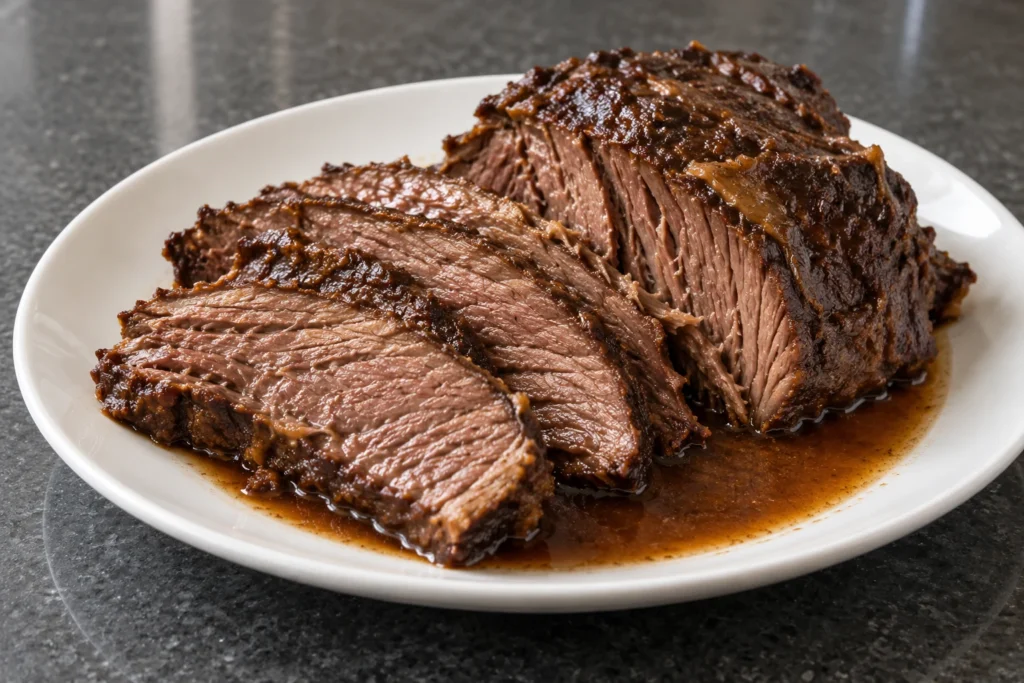
Chuck roast cooked fully tender will often fall apart into shreds the moment you try to slice it; that’s a sign of success, not a mistake. If you want clean slices for presentation, pull it slightly earlier, while the fork test still shows a little resistance, and let the carryover from a long rest finish the last bit of softening. If a shredded, stew-like texture is what you’re after, let it go the full time and break it apart with two forks right in the pot, mixing it back through the reduced braising liquid.
Mistakes that are specific to this cut
- Buying a roast with too little marbling. Chuck varies a lot in fat content between individual roasts; a leaner piece will still turn tender with enough braising time but comes out slightly less rich. Look for visible marbling throughout, not just a fat cap on one side.
- Skipping the sear. The fond left behind after browning is a meaningful amount of the final dish’s flavor, out of proportion to how quick the step is.
- Pulling it too early because the clock says it should be done. Chuck roasts vary in how much connective tissue they carry; always confirm with the fork test rather than the timer alone.
- Not skimming the fat. Chuck renders a noticeable amount of fat during a long braise; leaving all of it in makes the final dish heavier than it needs to be, though saving a spoonful to drizzle back over the meat is worth doing.
Why chuck is one of the best value cuts in this diet
Chuck consistently prices well below short ribs or brisket per pound while braising to a comparably tender result; the main trade is presentation, since chuck doesn’t carry the dramatic single bone of a short rib or the two-muscle complexity of a brisket. For a household eating this way regularly, chuck roast is one of the most dependable ways to get a genuinely good braised meal without the premium pricing newer, more popular cuts have picked up. See where the value actually is when you buy meat for more on this specific trade-off.
Turning this into meal-prep portions
A 3.5-pound chuck roast, shredded, makes enough for 5–6 individual meal-prep portions when paired with some of its own braising liquid to keep it moist through the week; a natural fit with the system in one prep day, a week of meat. Portion into individual containers while the meat is still warm, submerged in a few spoonfuls of the braising liquid, so it doesn’t dry out in the fridge the way plain shredded meat without any liquid tends to.
What’s happening inside the roast during those four hours
Chuck carries a large amount of collagen, the same structural protein covered in more depth in the short ribs guide; tightly wound fibers that make raw and lightly cooked chuck tough, and that slowly unwind into gelatin under sustained heat above roughly 160°F. The process described in Harold McGee’s On Food and Cooking is the same one at work here: moisture gets pushed out of the muscle fibers as they tighten in the first hour or so of cooking, which is exactly why a chuck roast checked too early can feel drier and tougher than the raw meat did; it’s passing through its worst stage on the way to its best one. Keep going past that point and the dissolving collagen starts trapping moisture again, which is why patience, not technique, is the real skill this cut is testing.
Buying the right chuck roast
Chuck roast is sold under several names depending on where it’s cut from within the shoulder; chuck roll, shoulder roast, 7-bone roast if a cross-section of bone is left in. Any of them work with this method; a bone-in version adds a bit of extra flavor to the braising liquid but isn’t required. Look for a roast with visible marbling running through the muscle, not just fat sitting on one surface; that internal marbling is what bastes the meat from the inside as it renders over the long cook, and a leaner-looking chuck roast, while it will still turn tender, won’t develop quite the same richness.
How chuck compares to other everyday braising cuts
| Cut | Typical price tier | Braise time |
|---|---|---|
| Chuck roast | Lower | 3.5–4 hours |
| Short ribs | Higher | 3–3.5 hours |
| Brisket | Mid to higher | 4–5 hours braised (10-plus if smoked) |
Chuck’s combination of low price and comparatively short braise time makes it the cut worth defaulting to for a regular weeknight-adjacent braise, saving short ribs and brisket for when presentation or a specific occasion justifies the extra cost and, in brisket’s case, the extra time investment.
Serving ideas beyond a plain plated roast
Shredded chuck works well spooned over a bowl of its own reduced braising liquid as a simple stew-like meal, piled into a wide bowl with extra warmed bone broth ladled over the top, or portioned cold into a quick pan-fry the next day with a fresh spoon of tallow to crisp the edges slightly; a different texture entirely from the soft, fall-apart result straight out of the pot. Because the meat itself is already well-seasoned from the braise, none of these reheated versions need additional salt beyond a light taste-check.
Storage and reheating
Stored submerged in its braising liquid, chuck roast keeps 4 days refrigerated and freezes exceptionally well; the fat and gelatin in the liquid protect the texture through freezing better than a dry-cooked cut would, see freezer burn on meat for more. Reheat gently on the stovetop over low heat, covered, with a splash of extra broth if it looks dry; a microwave works in a pinch but tends to unevenly overheat the edges of a dense, shredded portion before the center is fully warm.
Quick answers
Can I use a slow cooker instead of the stovetop or oven? Yes; sear the roast in a separate pan first, since a slow cooker can’t replicate that step, then cook on low for 8 hours. The fork test still applies the same way regardless of appliance.
My pot roast turned out dry even after hours of braising, what happened? This usually means either the roast was pulled before the collagen fully converted (check with two forks, not the clock) or too much liquid evaporated during cooking, leaving the meat exposed above the broth line for too long. Keep an eye on liquid level during a long stovetop braise and top up with extra broth if it’s dropping fast.
Is there a meaningful difference between chuck roast and chuck eye roast? Chuck eye sits closer to the ribeye and carries slightly more marbling and a bit more tenderness even before braising, usually at a modest price premium. Both braise well with this method; chuck eye has a little more margin if you’re worried about picking a leaner-than-ideal roast.
Can I braise a frozen chuck roast without thawing it first? It’s safer and gives a far more even result to thaw it fully in the refrigerator first, which for a 3- to 4-pound roast usually takes 24 to 36 hours. Braising from frozen means the exterior spends extra time at unsafe intermediate temperatures while the core is still thawing, and the sear at the start of this method won’t work properly on a surface that’s still partly frozen and wet.
Why does my braising liquid taste thinner than restaurant versions of a similar pot roast? Restaurant versions sometimes rely on flour or cornstarch to thicken the liquid into a heavier gravy, which isn’t an option here. A carnivore-friendly way to get a thicker, richer liquid without any starch is simply reducing it further; after removing the roast, simmer the uncovered liquid over medium heat for 15–20 minutes, letting water evaporate off and concentrating the natural gelatin from the bones and connective tissue until it coats a spoon more heavily on its own.
Adjusting the recipe for a smaller or larger roast
Braise time scales more with thickness than with total weight, similar to the point made about tenderloin earlier in this series of guides; a flatter, wider 2.5-pound chuck roast may actually finish close to the same time as a thicker 4-pound one, since heat and moisture reach the center at a similar rate either way. If you’re working with a notably smaller roast, start checking for fork-tenderness around the 3-hour mark rather than waiting the full 3.5 to 4 hours, and scale your broth down proportionally so the liquid still comes roughly two-thirds up the sides of whatever size roast you’re working with.
One more thing worth knowing if this becomes a regular rotation dish: the braising liquid left over after the meat is gone is not something to pour out. Strained and chilled, it sets into a loose, flavorful gel thanks to all the dissolved gelatin from the roast, and reheated gently on its own it makes a genuinely good, simple bone-broth-style drink or base for the next braise you cook, cutting down on how much separate bone broth you need to make from scratch.
If you keep a running stock of rendered tallow in the fridge for searing, chuck roast is also one of the better cuts for replenishing it; trim any larger external fat deposits off before the sear and render them separately in a small pan on low heat while the roast braises, giving you fresh tallow for the next few steaks without any extra shopping or separate cooking session.
Leftover bone from a bone-in version of this roast should not go in the trash either. Simmered again on its own in fresh water with a pinch of salt for another several hours, a once-used beef bone still has gelatin left to give up, making a lighter second-run broth that is still perfectly good for sipping or for starting a future braise, even though it will not gel quite as firmly as a broth made from fresh bones the first time around.
Visual steps
